The Contents Chapter of Chapters Top
This hasn't been updated in ages, and that's bad... But now it's back to date!
Check out the Miscellaneous section if you want official Vainglory art - there's a substantial amount of it!
{Last updated on 03/03/17 for Update 2.2}
Added
 Idris and
 Grumpjaw's stuff and updated pretty much everything else (and tidied some parts up a little)
These are the Recommended Builds for each Hero in the game. (To be clear, these are the items found in the "Recommended" tab of the Shop - they are by no means the best build for each Hero, but they should be viable and a good start for any beginners overwhelmed by the multitude of items in Vainglory)
The items are also in the Recommended Build order, and the total cost for each stage is indicated.
If anyone has any suggestions as to additional information I could put on here, or has noticed any mistakes/inconsistencies, please do send me a PM, or leave a comment in the Discussion tab.
~~~
This used to be just the Default Recommended Builds, but now it has become a compilation of various things. And so I decided that I needed an index.
~~~
If there's any news, or anything in progress, I'll put it here!
Vainglory Heroes: Listed by Name Top
Notes / Disclaimer
- Here is a list of all the existing Vainglory Heroes, listed in the order in which they are found on the
Vainglory Website.
- The Difficulty, Position and Role listed are taken from the in-app MARKET.
- The description of each Hero is quoted from the
Hero Spotlights, narrated by
Ciderhelm and
Zekent.
- (If anyone notices any mistakes/inconsistencies, or has any feedback/suggestions, please do leave a comment in the Discussion tab, or send me a PM.)
~~~
Vox
Dash-happy mage with sonic powers
Role: CARRY | Difficulty: MEDIUM
|
|

|
"Vox is a child of two worlds, navigating between technology and the arcane, and between the carefree world of music and the seriousness of circumstance. Simultaneously a Sniper and a Mage, he can choose to devastate a single target or wear down multiple targets at once."
|
Celeste
Back-line mage who commands the stars
Role: CARRY | Difficulty: MEDIUM
|
|

|
"Celeste lights the way for her team, calling upon her stars for both artillery and long-ranged reconnaissance. Though fragile, she is well suited to fighting from the furthest edges of battle."
|
Catherine
Disruptive tank with a stun and silence
Role: Captain | Difficulty: EASY
|
|

|
"Catherine relentlessly pursues her enemies, locking them down for her team. With a lifetime of training and experience, she is among the most reliable and consistent Heroes in the Fold."
|
Ringo
Fast-shooting gunman with epic fireball
Role: CARRY | Difficulty: EASY
|
|

|
"Primarily a Sniper, Ringo is able to weave through the battlefield, while slinging out bullets or setting his enemies alight from afar."
|
Adagio
Aristocratic healer with burn effects
Role: CAPTAIN | Difficulty: HARD
|
|

|
"He couldn't care less about the Halcyon Fold, but battle stays off the boredom for a short time. With potent abilities at his disposal, Adagio is quite powerful on his own, but becomes far more dangerous when paired up with a few allies."
|
Koshka
Hit-and-run assassin
Role: JUNGLER | Difficulty: EASY
|
|

|
"Koshka has picked up a few cat habits from her adoptive Grangor parents - the kinds of habits that are funny to a cat, but painful to everyone else; luckily for you, these habits make her an excellent killer."
|
Glaive
Menacing cat with a powerful rocket-powered axe
Role: JUNGLER | Difficulty: EASY
|
|

|
"Glaive is a devastating powerhouse, instantly dashing into the fray and knocking enemies into danger. Though vulnerable to slippery opponents, his damage and durability are incredible."
|
Petal
Munion master with enemy-chewing pets
Role: JUNGLER | Difficulty: EASY
|
|

|
"Petal attacks her opponents from a distance while swarming them with her Munions. Though small and adorable, opponents should not underestimate the strong damage and healing she brings to battle."
|
SAW
When you want a really big gun
Role: CARRY | Difficulty: EASY
|
|

|
"Able to burn through his enemies with a flurry of bullets or don the mask of an Assassin, SAW's versatility on the battlefield makes him a constant threat to those who oppose him."
|
Krul
Undead warrior terrifying to face alone
Role: JUNGLER | Difficulty: EASY
|
|

|
"Krul seeks release from his eternal curse but nothing he touches seems capable of bringing his misery to an end. Instead, most of his opponents have learned that the best way to deal with him is to keep their distance."
|
Taka
Stealthy ninja fox
Role: JUNGLER | Difficulty: HARD
|
|

|
"Taka weaves through the battlefield, slaughtering his chosen targets with his switchblades. He lives on the knife's edge, compensating for fragile defenses with agility and stealth."
|
Skaarf
Baby dragon with fiery skillshots
Role: CARRY | Difficulty: MEDIUM
|
|

|
"Skaarf blazes his way through the Fold, incinerating everything in his path. As Vainglory's first Mage, he specializes in powerful ranged abilities that can bring enemies down from a distance."
|
Ardan
Revenge-fueled father who protects allies with barriers
Role: CAPTAIN | Difficulty: EASY
|
|

|
"Like moving pieces on a chessboard, Ardan's power comes from his ability to reshape the battlefield, allowing his allies to seek better positioning while discouraging enemies from doing the same."
|
Joule
Heavily armored mech rider with energy beam
Role: JUNGLER | Difficulty: MEDIUM
|
|

|
"Joule is a melee fighter who excels in the front lines of combat. Built to take damage and dish it out, she can stand her ground against even the mightiest enemies."
|
Fortress
Pack leader who aggressively hunts prey
Role: CAPTAIN | Difficulty: EASY
|
|

|
"Fortress leads his team into battle, chasing down and initiating fights against even the most nimble opponents. He also inspires swiftness in his allies, understanding that the pack is only as fast as its slowest members."
|
Rona
Berserker always in the thick of fights
Role: JUNGLER | Difficulty: MEDIUM
|
|

|
"Rona is all about getting into battle and crushing her enemies. She is able to drive her enemies from her, using her extreme close-up damage to force teams to scatter."
|
Skye
Incredibly elusive, playmaking mech pilot
Role: CARRY | Difficulty: HARD
|
|

|
"Skye is a master of the aggressive pursuit, sacrificing her mech's heavy armor in favor of increased mobility. Her combination of lethality and vulnerability means she depends on split-second tactics to claim victory."
|
Phinn
Tanky river troll who hooks and pulls enemies
Role: CAPTAIN | Difficulty: MEDIUM
|
|

|
"Depending on your frame of reference, Phinn is either an unstoppable force or an immovable object. Though his movement is slow and deliberate, he has incredible control over the battlefield."
|
Blackfeather
Swashbuckler with evasive abilities
Role: CARRY | Difficulty: MEDIUM
|
|

|
"Blackfeather is a flexible Hero, able to build into a deadly Weapon Assassin, or into a Crystal Warrior who offers strong team support. Though weak early on, he can become exceptionally powerful if he is able to get ahead in items."
|
Kestrel
Stealthy archer with devastating skillshots
Role: CARRY | Difficulty: HARD
|
|

|
"Elite even among the elite, Kestrel was the lethal heart of the Stormguard. Though her Weapon and Crystal item paths create entirely difference experiences, both allow her to excel as a deadly long-ranged predator."
|
Reim
Resilient ice mage who must stay close
Role: JUNGLER | Difficulty: MEDIUM
|
|

|
"Although Reim lacks range, he makes up for it with plenty of Crowd Controls, durability and damage. Combined, he is one of the most dangerous Heroes at close-range, and can hold his own against nearly anyone who comes near."
|
Ozo
Acrobatic monkey with self-healing
Role: JUNGLER | Difficulty: HARD
|
|

|
"Ozo is a capable Warrior who brings strong initiation and sustained damage to the battle. When built defensively, he can alternate between being a front line presence for his team, and chasing down enemies as they flee."
|
Alpha
Killing machine with self-destruct/reboot
Role: JUNGLER | Difficulty: MEDIUM
|
|

|
"Unable to die, Alpha engages fearlessly, pushing her hardware well beyond its limits to take down her targets. Although fragile, she brings consistently high damage and maneuverability to her team."
|
Lance
Knight who skewers enemies and shields allies
Role: CAPTAIN | Difficulty: HARD
|
|

|
"With a unique polearm-and-shield combat style, Lance breaks enemy lines and creates opportunities for his friends. He can purchase Utility or Crystal items to excel in his Role as a Protector, or Weapon items to deal more damage during battle."
|
Lyra
Healer and zone mage who can teleport
Role: CAPTAIN | Difficulty: MEDIUM
|
|

|
"Lyra uses healing and protective magic to turn enemy positions into powerful zones for her allies. Utility and Defense items improve her role as a healer, while Crystal items provide a devastating but fragile Mage path."
|
Samuel
Cruel mage who summons darkness and sleep
Role: CARRY | Difficulty: HARD
|
|

|
"Samuel excels at aggression, slinging powerful spells as he moves to bully his opponents. He performs well in both the Lane and the Jungle, draining Health and restoring Energy as he fights to keep ahead of his opponents."
|
Baron
Rocket soldier with orbital strike
Role: CARRY | Difficulty: MEDIUM
|
|

|
"Baron brings incredible range and powerful burst damage to his team. When building Crystal items, he becomes mobile artillery, shelling enemy teams from extreme distances. His Weapon path enables aggressive maneuvering during combat, allowing him to quickly bring down high-value targets."
|
Gwen
Gunslinger who shakes off negative effects
Role: CARRY | Difficulty: EASY
|
|

|
"Gwen is among the fastest Heroes in Vainglory, able to move swiftly through the Halcyon Fold and quickly break free from dangerous situations. She is best played in the Lane where she can focus on earning Gold to keep an edge over her opponents."
|
Flicker
Trickster with a teamwide stealth
Role: CAPTAIN | Difficulty: HARD
|
|

|
"Flicker moves unseen through the Halcyon Fold, setting up traps for his enemies. With exceptional ambushing tools, he is a perfect match for teammates that need to get in close and stick to their targets."
|
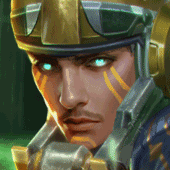
Idris
Nimble assassin who unlocks melee or ranged fighting styles
Role: CARRY | Difficulty: HARD
|
|
|
"With spear and chakrams, Idris adapts his fighting style for any situation. When played as a Weapon assassin, he excels at chasing and killing his enemies. On the other hand, his Crystal Mage path allows him to fight from the perimeter, kiting his opponents with ease."
|
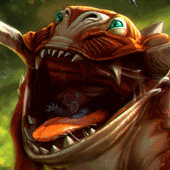
Grumpjaw
I don't have a caption :(
Role: JUNGLER | Difficulty: EASY
|
|
|
"Grumpjaw thrives on being in the front lines of battle. Capable of withstanding tremendous amounts of damage, Grumpjaw disrupts enemy teams by charging in and devouring Heroes whole."
|
Vainglory Heroes: Durability Top
{
Last updated on 11/09/16; numbers are up to date as of Update 1.24}
Notes / Disclaimer
- Here is a list of all the existing Vainglory Heroes, listed by their durability/tankiness.
- In order to do that, we compare each Hero's base EHP. In simple terms, this combines the HP, Armor and Shield values into a single value, and it allows us to directly compare the durability of every Hero in the game.
- (This idea is not original in any way, although the only other mention of EHP in Vainglory that I've seen, is
a reddit post by
ShinKaigan from a while back. Although the concept is the same, the values you'll find there are a little outdated.)
- The HP, Armor and Shield values that I have used are taken from the in-app MARKET.
- For each Hero, the average of their Armor and Shield values were used for the calculation.
- See final Chapter for a Disclaimer.
~~~
Heroes in order of Durability at Level 1
(A higher EHP value means more durability; list is in descending order)
~~~
Heroes in order of Durability at Level 12
(A higher EHP value means more durability; list is in descending order)
~~~
* The above EHP values only take into account the base stats of the Hero, ignoring any Heroic Perks. As a result, these particular Heroes may actually be more durable than their EHP value suggests. The following Heroic Perks directly affect the durability of the Hero:
-
Ardan: Mid-fight health gain from
 Julia's Gift
.
-
Catherine: Bonus Armor and Shield from
 Captain of the Guard
.
-
Grumpjaw: Bonus Armor and Shield from
 Living Armor
-
Joule: Bonus Armor and Shield from
 Heavy Plating
.
-
Reim: Fortified Health from
 Frostguard
.
-
SAW: Bonus Armor and Shield from
 Spin Up
 stacks.
Some abilities also increase a Hero's durability in some way or another; I have decided not to list them, firstly because they are temporary effects (since they are active abilities), but also because I want to keep things as simple as possible.
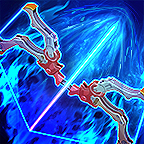
Celeste and Kestrel: Global Ultimates, Kraken Snipes! Top
{
Last updated on 24/04/16}
Disclaimer
- In my calculations, I have used
Owens' Map of the Halcyon Fold with Distances (
image) as a source for various measurements. I neither own nor claim to own any part of it.
- None of the below values are precise figures, although they have been tested and are reasonably accurate. If you quote the figures without crediting me (and it turns out that they're wrong), I am not responsible in any way for what might happen as a result of that :/
~~~
- Here's something a little different... Rather than accurate calculations or definite text, I decided to take a breath of fresh air, so to speak, and create some information requiring estimations and approximations.
- First, I took a look at
Kestrel's
 One Shot One Kill
... Other than discovering that it had an activation range of roughly 160, and also couldn't hit enemies if they were outside of that range, there wasn't really a lot to play around with:
One Shot One Kill
|
|
|
Channel Time: 1.5 seconds
Activation Range: 160 (metres)
Projectile Range: 160 (metres)
Projectile Speed: Instant
|
~~~
- After that, I took a look at
Celeste's
 Solar Storm
. I found that it also had an activation range (of 180). However, "
The projectiles are global even though the targeting ring isn't quite global." (
Kraken_SEMC on
a reddit post).
- Then I wanted to work out
Solar Storm's projectile speed. According to the
1.3 Patch Notes, the "
Projectile speed [was] slowed from 22 meters/sec to 16.", and hasn't been changed again since.
- However, I wanted to do my own testing, and so I used
Owens' Map of the Halcyon Fold with Distances (
image) as my main source of reference for measurements.
- During the first few tests, in which I launched
Solar Storm directly from the Blue Sanctuary (spawning platform) to the Red Sanctuary, I estimated its speed at "
slightly more than 16 metres per second" (quote: me).
- Then I aimed for the Healing Monster in Red's Back Jungle, from the Blue Sanctuary, and got the values 121.7m/7.5s, which gave a result of
16.2m/s.
- Now, I wasn't really sure which value I should use. If the projectile speed was indeed 16m/s, then
Owens' map would be scaled slightly too small, which was a possibility. However, since I had used
Owens' map for every other measurement, and also with the 1.3 Patch Notes being over a year old (and so potentially wrong), I decided to use the figure
16.2m/s.
Solar Storm
|
|
|
Channel Time: 1.0 seconds
Activation Range: 180 metres
Projectile Range: Global
Projectile Speed: 16.2 m/s
|
- So, what can we do with this information? Well, I could make a program that asks for two locations and then outputs the time... But that's too complicated, and frankly, not particularly useful in the heat of battle.
- Umm... Kraken Snipes from the Blue Sanctuary? ...Why not? (Yes, fairly situational, but it's the most obvious way to apply the data above. Just a number "16.2" is meaningless by itself, without any context.)
- So, once again, using measurements from
Owens' map, and also the figure that we have for the projectile speed, it is possible to calculate how much time you would need to allow for a
Solar Storm launched from the Blue Sanctuary, in order to steal or secure a Kraken.
- Below is an image labelled with the results.

- For those who cannot view the image for any reason, here is what I found:
- I picked four locations where a Kraken capture is usually attempted, and calculated the following:
[1]
The Kraken Pit, where Kraken usually stands
Distance:
83.2 (metres)
Time:
5.1 seconds
[2]
Inside the Enemy Tri-bush
Distance:
89.6 (metres)
Time:
5.5 seconds
[3]
The centre of the Jungle Clearing
Distance:
85.8 (metres)
Time:
5.3 seconds
[4]
Inside the Friendly Tri-bush
Distance:
75.6 (metres)
Time:
4.7 seconds
~~~
Important Notes!
- Firstly, the 1 second required to channel
Solar Storm is not included in the above figures.
- Also, learning those exact numbers is quite arduous and not necessary! In reality, there are plenty of variables that create margins of error (eg. which of the 3 positions you spawn in), so it's impossible to time it perfectly.
- Instead, from the above data, you can see that a Kraken Snipe on average requires around 1+5 seconds, so just remember that it's
6 seconds to Kraken! Simple...
- (Yes, I have tested out those figures, and I can say that they are honestly as accurate as they need to be...)
- However, I have not tested out sniping from the Red Sanctuary, although from the map, it seems to be the same distance from the Kraken Pit (or even possibly slightly closer).
Some Other Useful Timings
From the Blue Sanctuary to the...
- Centre of the Lane:
4.9 seconds
- Kraken Pit:
5.1 seconds
- Enemy Jungle Shop Bush:
5.6 seconds
- Second Enemy Turret:
7.0 seconds
- Enemy Vain Crystal:
9.6 seconds
(Don't forget to add 1 extra second for channeling!)
Again, learning these numbers isn't too useful, but hopefully by looking at them, you can get a better feel for timing long-ranged
Solar Storms.
~~~
- So yeah, good luck, have fun... Nothing in this chapter has been extremely precise, but none of that matters... etc
- Hope it helped! Because I definitely won't be making another chapter like this any time soon :P
Vainglory Heroes and Items: Miscellaneous Top
{
Last updated on 01/03/17}
Notes
- Not much to say - this is the miscellaneous section, which I'll keep adding to (if I find relevant stuff, that is). You'll find information that isn't specified in-game, but is interesting/useful, though at the same time not complex enough to dedicate an entire chapter to.
- Oh yeah, and official Vainglory art!
Official Vainglory Art
Introduction and Additional Notes Top
(This a messy chapter! (I basically just dump stuff here instead of deleting it from above...) It's not formatted, and most of it is probably no longer relevant or is out of date. (Additionally, it was written back when I was far less articulate than I am so).
Disclaimer
- These builds are purely for reference, and I do not claim ownership of them. I only made this compilation because I couldn't find the Recommended Builds anywhere on the Vainglory Forums or Website.
- In advance, I apologise for the amount of text. Yes, I agree that I probably overdid it... a bit...
- So anyways... I made this 'Guide' page on VaingloryFire quite a while ago, and it started off with just the Recommended Builds for each Hero. Then I added a list of all the Heroes, with a brief description for each of them (I did that mainly because I was bored one day).
- Since then, I've been wondering what other information I could put on here which is not only interesting, but also useful and understandable.
- I would just like to point out (again!) that none of the information on this page has been discovered or created by me; I have merely found information in the Vainglory app, and transferred it onto this page, in an accessible and (hopefully) simple format. I find this information very interesting and useful, and I hope that others do as well.
- To be honest, I just see this page a compilation of various bits of information, put here in a way that makes it easy to refer to;
please don't post unnecessary comments about the lack of original material here. I mean, seriously, I've got a huge Disclaimer and everything!
~~~
Larnce's Heroic Perk -
 Partisan's Technique
|
|
|
"[Lance's] attacks are slow to land and attack speed is less effective on him." Lance does not gain base Attack Speed from leveling up, and his basic attacks take 1.7 seconds each (which is approximately 25%-40% slower than the average Hero's basic attack at Levels 1-12, respectively). Also, Lance only gains 60% of an item's "Attack Speed" stat, so for example, he would only gain "45% Attack Speed" from a
 Tornado Trigger instead of the stated "75% Attack Speed". Tornado Trigger instead of the stated "75% Attack Speed".
|
[EDIT: This may be not be entirely accurate, for reasons mentioned in the
Weapon Items Chapter above [EDIT2: Removed that, sorry]]
Ozo's B Ability -
 Acrobounce
|
|
|
Each time Ozo bounces off a target (to hop onto another), he earns 1 Gold; this applies to both allied and enemy Heroes/creatures. In other words, if Ozo bounces on two targets, he earns 1 Gold; if he bounces on three targets, he earns 2 Gold. Gold earned in this way neither contributes towards Creep Score, nor the amount of Gold Earned on the post-match screen.
|
~~~
Work that's in the Works
-
Weapon Items Analysis: How to Maximise DPS (WP vs Attack Speed vs Crit)
(I have a DPS calculator on Excel - as do a few Vainglory websites and apps I think - but it's a bit redundant without knowing Heroes' base Attack Speed. The number 1.3 was mentioned in a recent Patch Notes I believe, but I also seem to remember that there are many exceptions to that.)
-
Weapon Items Analysis: How Good is Breaking Point?
(I've done some calculations for a friend, but right now it's merely a few pages of scribbles as well as the above calculator)
Work on Hiatus
(I will work on this/these at some point, since I know there's a reachable conclusion to be found for it/each of them.)
-
Vainglory Heroes: Base Attack Speed
(...watching various Heroes hitting the enemy Vain Crystal didn't seem like the most productive thing to be doing while procrastinating revision for school exams)
-
Glory/Essence Analysis: Crafting/Destroying, Weaving Skins, Opening Glory Boxes
(I'm so very close to completing this one - All the calculations and analysis needed are done; I just haven't been able to find a satisfying conclusion.
Update: This is now on hiatus because it was discussed in an article on Broken Myth
literally the same week I was going to add it to my Guide!)


Quick Comment (26) View Comments
You need to log in before commenting.