Some Things To Keep In Mind Top
[*]
ALL matchups and item builds are under the "Poke/Sustained Damage" hero builds section. I can transfer all information across all builds if enough requests are made for me to do so.
[*] The reason there is no starting items for mana sustain is because it is not really needed as long as you are being smart in lane. If you do feel as though you need mana sustain though, feel free to buy a Void Battery as it is cheap and can help certain players quite a bit.
[*] The Poke/Sustained Damage build is BEST versus team comps with little-no tankiness. HIGHLY recommend not using the ability build versing tanks as the other build can do more damage and have far more control on the battlefield.
[*] The Wave Clear/Burst build is BEST versus tanks and is recommended when versing them. The ultimate, Dragon's Breath

can deal far more damage due to the shield piercing it provides (15% bonus).
[*] For the two builds, if you are versing something like a tank and two assassins, it is best for you to use your own judgement. I personally would say that the Poke/Sustained Damage is the better build, but it depends on how capable you are of placing Goop
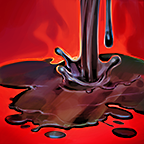
against assassins without the getting out.
[*] The Weapon Power build is best if you have lots of crystal damage on your team already. It is also quite capable of shredding tanks, but in it's own way. If you use

it will apply

which means, in it's most basic form, that all of your attacks during the duration will deal 3% of the enemies' max health per hit, which, in combination with a lot of attack speed can add up rather quickly. It is this damage mix which creates a bit of confusion for the enemies, yes, you deal a lot of weapon power damage to them, but what most forget is the 3% max health damage they are taking every hit when Fan of Flames

is applied. It is important to note as well that when you critically strike, so does your Fan of Flames

which means you will be dealing 5~6% of their max health on that hit as crystal damage...
[*] The weapon power builds are just examples, they ARE NOT the only viable options. Use your best judgement to determine your build, or use one of the ones listed and adjust as need be.
Ability Explanation Top
Poke/Sustained Damage
The reason we are maxing out the Spitfire

is because it provides the most damage by far in terms of poking down the average laner. It hits like a truck (quite literally) very early in to the game. This allows an easier laning phase, normally due to enemies being forced to go back to base so often, which allows what I like to call a "farming phase" - a phase in which there is no opponent competing with you for farm or harass in lane and allows the maximum gold income with the least downsides possible.
As for the part of the build recommending you only put 2 points in to Dragon's Breath

, it is situational.
IF you are versing tanks, the 3rd points is definitely worth it. Otherwise, if you are versing squishies, it is best to get another point in to

because it provides the most sustained damage and poke damage in a fight.
Wave Clear/Burst
I have seen this build quite a lot recently, and it is quite good if you are wanting to reach "end game" faster in terms of building items. It provides high amounts of wave clear, while providing less damage in terms of poke. If you are constantly under tower/siege, this build helps a LOT... It clears out waves in moments with the slightest bits of Crystal Power. The build is also very strong if you do the


combo on already-burning enemies.
Do note that this build is not always the best, should not be used every game, and is very situational. It also takes a bit to get used to, so don't expect insane results in the first game.
As for the part of the build recommending you only put 2 points in to Dragon's Breath

, it is situational.
IF you are versing tanks, the 3rd points is definitely worth it. Otherwise, if you are versing squishies, it is best to get another point in to

because it provides the most sustained damage and poke damage in a fight.
Tips And Tricks Top
If an enemy is burning, you can use

and it will instantly "detonate" to deal the initial damage, and the DoT (Damage over Time effect) to all surrounding enemies.

can be used and hidden in a minion wave, or if more than half of it is hidden in a bush. This can catch enemies off guard if you detonate it with Spitfire

or if you use Dragon's Breath

as most enemies will be slowed by it, guaranteeing that you can get a full channel, or most of the ult channel before they can move. For those unfortunate enough, they will be taking burn damage from Goop AND Dragon's Breath, which is enough for most enemies to die within a very small time frame.
If you ever use

and you have a Frostburn

, you can permanently slow enemies during the duration which will allow your team to follow up and easily catch off high-priority targets in hectic fights! Remember, Frostburn is your friend as Skaarf.
Channeling Dragon's Breath

in a bush can be VERY useful as long as you channel in the opposite direction of the target so you don't give away that you are channeling. This catches most enemies off guard and can land a lot of surprising kills.
Fan of Flames

, Skaarf's passive, can be VERY helpful for all Skaarf players, as it helps kill tanks. Remember, keep your burn on anyone that you are fighting, ESPCIALLY tanks. The max percentage HP damage can allow you to kill a seemingly unkillable enemy in moments. Remember, it does 3% of their max HP per auto attack while they are burning and that is from the start of the game. DO NOT underestimate this damage output as it can critically strike as well if you ever build critical strike chance.
If you are low on health and a teamfight breaks out, NEVER underestimate the power of Eye of Harvest and Dragon's Breath, it can heal for almost all of your health if you use it properly, and can be done safely if you channel in a bush a ways from the fight as long as you aren't too far away from the action.
Remember, being safe is better than being cocky and potentially setting yourself further behind. When you fall behind, DO NOT try to make plays solo, play safer and only go for the safe plays. Farm up, and try to get yourself back on your feet. Remember, defensive items can help loads to anyone that falls behind, it provides survivability and most importantly, a chance of living in fights. Only 3 items can be considered good on Skaarf, but they are better than nothing.
Objectives and Strategies [Work in Progress - Not Complete] Top
Skaarf is very deadly and can devastate and entire enemy team single handedly in terms of objectives. Here are some tips and tricks which I do often which will help you win more games, and obtain more objectives.
Although a lot of people tend to get mad when you do this, if you are low in lane instead of backing, try taking the
life camp (for those unfamiliar he is the jungle monster by your base just below the 2nd turret usually, and there is one just below that as well). This is ultimately an equivalent of a better Halcyon Potion, and will normally heal around half your health or more, along with a nasty mana regeneration buff. Use this to maximize your up-time in the game and frustrate your enemies, while generating more gold than anyone else could imagine.
If you ever happy to be using the Wave Clear/Burst build and you clear out a wave early but the enemies are defending, do not just sit around and hope something will happen. Instead, I recommend farming the jungle till the next wave is about to clash with yours in lane. Some of the best camps for gold would have to be the Double Golems (bottom of the map on your side, they are on two sides of the wall) which sometimes can be snagged for 120 gold a piece! That's 240 gold or so for free and it only takes a couple seconds to kill!
If you happen to know the enemies are in a bush but are unsure where, simply throw your Spitfire

in to a couple of bushes. If it does not reach the maximum range that the ability should be able to reach and you see some fire particles, turn around and run for your life. There is an enemy there. Or if you decimating the enemies during that specific game, lob your Goop

at the area you believe they are, or chase them down if you happen to have Frostburn

at the time. Do note that Frostburn will keep enemies in the goop for longer than normal, so they won't be going anywhere any time soon.
If the enemies are all missing but are not dead, the first place you should consider checking would be the Kraken, but be careful! Good players will use this as a bait so that their entire team can pick your team off one by one. I recommend throwing Spitfire

in to the bushes, and if it connects with an enemy, be cautious. Otherwise if you are confident that the bush is clear, proceed with more caution. When you think it is safe (do not wait too long or you miss the opportunity) exit the large bush by the Kraken and check if there is an enemy there, but stay on your heels. Most of the time, teams will be sitting in the bush on their side of the map with the kraken hidden in the bush, so if the Kraken is alive but not where he should be, head towards the enemies large bush by Kraken and charge your Dragon's Breath

preemptively. Every time I do this strategy, I typically steal the Kraken with it while simultaneously killing 2-3 enemies.


Quick Comment (3) View Comments
You need to log in before commenting.