Introduction Top
Hi, I'm
Higaara. This is my first ever guide on
VGFire. If you have any constructive critic about this guide please comment so I can adapt the build or it's presentation. Sorry for my poor coding skills as I'm not yet used to VGFire's code.
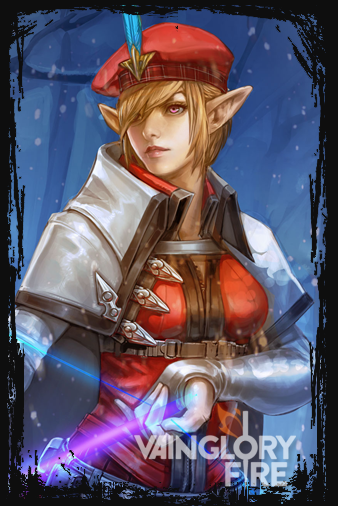
Kestrel is one of my favourite heroes. Evasive, tricky, deadly. She can turn the tides of a whole teamfight or strike down solo targets from the shadows. Although it is a complicated hero to play as she is very fragile when caught offguard, hardly 1vs1 without preparation/surprise and has spells quite hard to land but incredibly deadly with good skills. I don't recommend these builds for beginners as Kestrel is very hard to play well. There's a few way to make things right and a million others to screw up. As you play Kestrel, you'll more likely be tagged as "primary target" the whole game. Take this into account and remember that everyone in the other team will want your skin so make good use of your mobility and evasive nature. Even if you're probably the biggest damage dealer in your team, you have to be constantly more afraid of the ennemy team that they are of you. Don't be a coward but don't blindly go into their team without vision/detection and always plan the ennemies' route be it to cut their retreat, stop their attack or just be sure to kill them. You'll have to take risks but always
take precautions as you can die very fast.
If you play her my ways, you will HAVE TO take the initiative whenever possible, don't let the ennemies engage before you do. If it's the case, live to fight another day and run as fast as you can.
Try to play Kestrel if you're the last picker of your team in the draft since she attracts counterpicks like sugar attracts wasps. Try not to pick her if you are against a lot of aoe heroes (Phinn for example) or ones with spammable/very high damage directional abilities (Skye's Forward Barrage, Samuel's A, etc). They can uncloak you more easily than the others.
(Attention, this guide treats Lane Carry Kestrel but both builds are, of course, adaptable to jungle with a few modifications!)
Abilities Top
 Heroic Perk
 It will be crucial to use in the early game as you can deplete your energy quite fast (Active camo's cost halves your bar at lvl 1). Try to constantly have your 5 charges as it will reduce your abilities' cost from 50% which is huge. Do not care about it if you're either out of the lane or not in the early game anymore as you'll have enough energy to bear the cost of your abilities.
 Glimmershot
 is a tricky spell to cast as it needs precision and coordination. It will be, in both build, the main source of damage in a teamfight or for farm. It has a high Crystal rate, has a very long range and is spammable; it's energy cost is relatively low but be careful as a constant use can empty your energy quite fast. Mind your arrows : you only have 4 and since you're building CP, they will reload slowly which is compensated by their burst. In both, build, you'll make more use of the weapon percentaged damage in the early levels as the starting crystal damage is quite low so make sure your target isn't behind creeps. Once it's leveled and you have some crystal items it becomes much more efective at long range and gets through creeps without problems.
 Active Camo
 is your escape and mobility tool but it can also be used as an initiation by using the Mist as a trap. That makes the ability very versatile and useful. The stun is very short but you can align the mists (maximum of 2 at the same time) to set up a chain stun or a massive burst. It has the best Crystal rate of your kit. Crystal Power make the invisibility last longer so you can eventually use it again while still being under its effect. Weapon power decreases the cooldown reset issued when you're hit. Try to always predict the ennemy's path so you can trap them easily.
Important mention : The Camo dissipates if you're hit under its effect EXCEPT if the source of the damage came before you launched your Invisibility. That means you can remain invisible if you time your Camo by using it right after you see the attack start (example: If Krul uses his ult on you and launches his sword, you can use your Camo while the sword is still in the air). DO NOT rely too much on this mechanic , you have a very short window to activate it in time but it can save you a few seconds if done well. Your only way to escape some attacks and remain safe even after it will depend on this trick.
 Your Ultimate.
 Its base damage is weapon based with scaling armor piercing but possesses a very high Crystal rate. It is your most powerful burst for the same energycost than the Glimmershot. You can use it to snipe long range targets, fleeing opponents or even steal objectives. You can also use it in conjonction with your Camo's Mist for a maximum burst damage. Most targets will not resist this combo in the mid/late game if you are ahead enough in items, particularly if you already have a Broken Myth or Piercing Shard. It is very powerful so don't hesitate to use it. For a safer use, Glimmershoot an ennemy you baited in the Mist and use the stun duration to charge One Shot One Kill on your target.
Early Game (Both builds) Top
I will sum up all of this simply :
Play safe ! Have a plan ! Follow the plan ! On lane, stay the closest possible of your turrets by letting the ennemy laner push the wave. Only attack for last hits or harrass the laner but take the less risks possible. Stay on your side and either behind minions or at the top of the lane in the bush; that'll help escape most ganks. The ennemy probably knows what Kestrel is able to do if well farmed and well played. They will probably try to harass you and kill you
as soon as they can. Focus on farm and safety. If there is a teamfight,
stay at the rim of the fight, preferably at your teams side, except if you're ambushing them but it isn't very safe to do in the early game.
Don't forget the boots.
You'll have to run A LOT to survive.
Grab some flares if you know the ennemy captain started mining. It's cheap and doesn't make you take much risks. If your captain doesn't mine, you will probably have to put one or two as a safety measure. Flares don't break the invisibility but now we can see from where come a flare so be careful when using one.
Pick a
defense item which matches your needs : armor/shield for whichever makes the biggest threat to you or Dragonheart (that you'll make into a Slumbering Husk) if you only fear bursts and feel like you can escape easily enough.
Recall when you kill unless you have to protect the lane, your teammates or you can take an objective safely. You're the only defender of the lane, don't leave it exposedd for too much time. That means : recall only if you have to, buy at the side shop and (obviously) stay on the lane. If you push the lane too much, you will be exposed and help the ennemy laner to farm because they'll take less risks to do so. If you don't push it enough, you'll leave your turret exposed. Hit the turret with Glimmershots whenever the creeps disable its barrier. Make use of your Adrenaline passive : your mana melts easily and your damage come from your Glimmershots.
Mid Game (Hunter path) Top
Hunter path is based on your capacity to play with your team, to keep the ennemies far and maintain an aggressive (but careful) constant advance of your team. Basically, the strategy is to force them to retreat or die.
Now it's time for you to buy
Spellfire. The new object is perfect for this path as it makes your pokes deadlier with the damages over time. It also hasa great synergy with the Drangon's Eye. That done, your kill potential becomes much higher as long as you stay in "poke range". You now deal less damage than with a Shatterglass though so don't expect the ennemy team to blow up immidiatly since the passive doesn't stack. You can now start engaging the ennemy team on your own but keep in mind that you'll have to make good use of
communication signs outside and inside teamfights. You have your own power and can sustain a bit but you remain fragile and your team is here to protect you. Try to stay with them whenever you quit "controlled territory".
The ennemy will have a hard time escaping or engaging you with Frostburn enhanced by Spellfire's passive but remain as far of the center of the fights as you can. Plus, Frostburn won't help much against ennemies with movement abilities like Rona or Glaive. Try to always designate your target (unless it is totally obvious) and find the balance between the harassment of the ennemy team and the elimination of the "person of interest". The lifesteal from Eve will keep you alive while you flank the ennemies or run away. Stay at the edge of the fight if possible : your range is excellent so make sure to use it correctly. If you believe the ennemy will try to close the distance with you/your team, place a Mist preemptively that you'll be able to blow up when they do. If you think you can use Camo and leave a Mist on the ennemies' path without taking risks, don't hesitate but be careful to mines, flares or ambushed/incoming ennemies. You should also use it to flank the ennemy team. Stay with your team if you go into ennemy territory.
You can be more aggressive in lane and push as much as possible to damage the Turrets.
Finish your defense item.
The choice of the boot will vary with the match, I recommend Halcyon Chargers and Journeyboots for obvious reasons but knowing if you need more energy sustain or if you really have to run away/jump in a lot is up to you. In any case, it heavily increase your survivability so don't underestimate the boots.
Remember than taking objectives wins games, kills alone don't.
Attack the turrets whenever it's possible and safe to do so. Again, use your high range to take them down and see the turrets melt with Spellfire's passive. Don't stay too long in dangerous areas as you don't have that much energy capacity.
I've put the
Sorrowblade as an option in this build because
weapon power decreases the cooldown malus when you get hit and boosts a little bit your movement speed. That means that, since you need to stay away from danger, if you get picked off in the open, you'll have a higher chance (if you escape the ennemies for a few seconds)to active your Camo and run. Eventually, if the effect triggers at this precise moment, the Clockwork passive will do the same effect but it is way less reliable than a guaranteed lower cd penalty.
When taking Gold Miner or Kraken, always stand in the ennemies' side in the big bush so you can see them coming from afar and trap the zone.
Mid Game (Trapper path) Top
Trapper path is much more tricky and high-risk/high-reward than the other one. It is based on aggressive furtivity, ambushes, traps, surprise, patience, reflexes and your ability to terrorize the ennemy team *dark knight theme playing*. You guessed it,it's my personal favourite (nananananananana Batman!) but also the less reliable of the 2 and the less situational as it has many threats.
Attention ! This path is very risky and requires a lot of map control/awereness with mines, flares, etc. It's probably not a good idea to take this path if your captain doesn't mine but the ennemies' does. It can be taken if your jungler and captain are able to draw the ennemy team's attention long enough for you to trap the place.
Make use of the "We need Vision" button, as much as you need.
Don't let anyone touch you...ever. Be quick, be deadly, always slip through their hands. Your camo is your life. If you're revealed, you're as good as dead. Since you need to build up over your Camo, you won't max Glimmershot. You'll upgrade it until it's 4th level because it's your main source of damage when revealed but it'll stop there as the bonus attack-percentaged damage doesn't matter much to you. You will then take the Active Camo overdrive as it increases the mist and invisibility duration,reduces the cooldown and increases the damage, all that in a single overdrive. Besides, the 30 more damage from the Glimmershot overdrive is compensated by your higher immediate Crystal power and you need your Ultimate for the immense burst it gives.
What you're gonna need for this build is a lot of crystal power, obviously, but also
energy and cooldown reduction because of the Camo's energy cost, which means
Clockwork takes priority after
Shatterglass. You'll obviously need the extra energy and cooldwon reduction from the Halcyon Chargers and a little more crystal power makes you able to use Camo constantly just with those two. Also the new
Brokenmyth has now a huge piercing, increasing your ambush capability. Stay cloaked most of the time for increased mobility and avoid being ambushed yourself.
I already said it, but I'll never say it enough
be careful,
plan and act in consequence because this path puts you directly into the action.
Your job is to run into the ennemy's path, put down Mist traps and burst down alone targets or make the whole ennemy team explode during teamfights. You'll have to ruse to lure the ennemy team where you want them : inside your Mist. Make sure your allies assist you so they can lure the ennemies into your traps. You must make use of your mobility and always stay in movement until you find your target and have all traps set. Remember that if you're against adversaries with AOE abilities you have to move on the edges of the combat, to not risk breaking your Camo by accident, then, outflank them and blow them up. Use the element of surprise to confuse them. If you have been seen, move unpredictably while under Camo (i.e you can run on the ennemy's side to hide and recall). Never be where they expect you to and unleash chaos when you're set and ready.
When you successfully ambush someone, don't just stay there while they're recovering from the stun. Analyse the situation : will they survive a few more Glimmershots ? if not, put down another mist after the other(s) have blown up to either lure them to you or protect yourself if they try to go for the kill.
If you're not spotted, search for lone targets you can take down easily and retreat. It's important for both survivability and mental warfare to be always moving. You'll be less surprised by traps, ambushes, etc. while they will be way more.
Try to always take some distance after you've put down a trap even if you're sure the ennemy won't escape : you never know if there can't be an incoming ennemy to save/avenge his comrade you didn't spot. Since no plan is perfect, you may be taken in the open some times under some bad circumstances. If you really feel like these situations happen too often and that you need an insurance (since you'll probably die a lot with this build in this situation) get yourself a Slumbering Husk or an Aegis. Taking armour is often less useful since (except when a WP baron is in the ennemy team) the only AOEs (which are the main reason you'll be revealed) in the game are ability based ==> Crystal power. Also Aegis' active is a low cooldown reflex block. You probably won't be able to face WP ennemies anyway: if you've been revealed, you'll be dead where you stand if they can get you. If you are confident enough on your evasion capabilities, get another Shatterglass. A Dragon's Eye is a no-go, you can not stay in the fight long enough to make profit of its effects.
As for your lane behaviour, it's the same as in the Hunter path : be aggressive in pushing when you have enough power and use your range to take down objectives. Be very careful on the lane as you can't be permanently cloaked when farming and it makes you become very vulnerable.
If you do well, you'll make the ennemy team afraid which will force them to spend money in detection, be more careful with their farming (which will make them farm less) and hesitate to fight. This is why you need to be as brutal as possible because it will frustrate them and they will probably be less able to even play well. It also means that they'll spend less to counter the rest of your team; after all, they're as much a key aspect to victory as you are, you're just the most wanted.
Remind your captain to mine and flare anytime possible and do it yourself if they don't : your life depends on that. If there is a teamfight, be careful with aoe's and eventual flares/mines set when fighting and try to stay away from the brawl until you know where to place your trap. Don't forget to take distance : overconfidence (is a slow and insidious killer) and impatience will be the main reasons behind your deaths... But it will be the reasons of theirs too.
Late Game Top
You have now a very strong damage output. At this point, you want to end the game as soon as possible so you better push as much as you can but
don't die. A death at this point means a very long respawningtime and cuts your team from a huge source of power.
Get objectives as soon as you get an ace but
the Kraken takes priority. Have a warning here though :
DO NOT DIE FOR THE KRAKEN. If the Kraken isn't escorted all the way to the turrets and Vaincrystal she will take too much damage if there are ennemies to defend.
DO NOT DIE FOR TURRETS EITHER, if you die here, you leave a lot of time to the ennemies to regroup, fight back and take YOUR objectives.
Remember that your range is excellent and the turrets' barrier take time to regenerate. Use this at your advantage : your Gimmershots outrange the turrets and you can spam them 4 times in a row. You should be powerful enough at this point to drastically damage the turret even with their barriers on and even destroy them without the help of creeps. Make sure the ennemies are inside their base or very far away and/or very busy before doing this and make sure to keep them distant. You should increase your damage even more with an Infusion.
As a trapper, it should be easier since this path has the biggest damage output but the hunter will have a better control on the ennemies defense with frostburn at the condition that you constantly harass them while damaging the turret.
Conclusion Top
So here is a small recap:
Hunter Path :
- Very high mobility (even more with Sorrowblade)
- Better to take down turrets
- Movement control of your ennemies
- Works well with team coordination
- High burst and consistent damage (keep attacking whenever you can)
- Relatively good survivability
- Good flank potential
- Allows your team to win ground and map control
- Relatively low mana cost per attack but don't overuse them too much
- Very safe depending on your positioning
- Less energy sustain
- Slightly less damage
- Less "surprise effect"
Trapper Path
- Be the Batman
- Very high damage
- Eliminate targets even before a teamfight begins (High solokill potential)
- Good flank potential (but more risky)
- Surprises and confuses ennemies
- Brutal for the ennemy team
- Makes the ennemy take less risks, avoid fights, farm less and stay at base/under turrets
- High energy sustain
- Can work alone without problem but stays a great asset in teamfights
- Hit and run approach
- Very risky
- Low survivability
- Very vulnerable to detection items
- Depends heavily on the Captain's demining
- Will paint a target on your head: you'll always be the "Most Wanted"
That's it ! The guide is over. I hope you liked it and that it helped you.
Anyway, Farewell and Good luck in the Fold.

Quick Comment (1) View Comments
You need to log in before commenting.