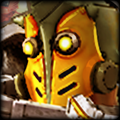
Who is Ardan? Top
Ardan is a hero that excels in protecting allies and changing flow of a teamfight with his ultimate. He is typically played as a Roam, which is what this guide will focus on.
Ardan synergizes well with high mobility carries like
 Skye
Skye,
 Ringo
Ringo,
 Samuel
, and
 Vox
Vox due to the speed boost on his shield enhancing their kiting. He also synergizes with in-your-face melee heroes, like
 Koshka
,
 Rona
Rona, and
 Alpha
Alpha who can stick to their targets even more with increased movespeed.
Pros:
- Tanky
- Works well in every team
- High impact ultimate
- Resourceless
- No hard to land skillshots
- Mobile
Cons:
- High cooldowns
- No hard CC on non ultimate skills
Skills Top
|
|

|
Ardan heals for 1% of his missing health every time he takes damage. The healing can never exceed 75% of the damage taken. Instead of energy, Ardan uses a yellow meter called Vengeance. Vengeance builds over time and can also be gained with basic attacks, critical strikes and abilities. Because Ardan has no energy, any bonus energy (5%) and energy regeneration (50%) are converted to crystal power.
|
It's a good passive that helps you body block things.
|
|

|
Ardan dashes to an ally, damaging and slowing nearby enemies while granting the target a burst of move speed and a 3-second barrier that scales with 25% of Ardan's bonus health. Any time the ally takes damage, Ardan gains vengeance. This ability can be used on Ardan, but the barrier, speed boost and vengeance gain is only half as strong.
Overdrive: Vanguard grants 30% vengeance when cast on an ally.
|
A very important ability for Ardan. It can be used defensively for the shield and speed boost to escape, and also offensively for the speed boost on an ally and slow on an enemy to pursue. It has a long cooldown, so use this shield when your ally will be focused hard. Try not to use this skill on yourself, since its effects are halved.
|
|

|
Ardan leaps forward and punches his target. This deals crystal as well as weapon damage (that can crit) and is treated like a basic attack. Blood for Blood can only be activated when Ardan has 100% vengeance and will consume all of it. Overdrive: Blood for Blood deals an additional 25% weapon and crystal damage.
|
This skill is good harass early game, but its damage is pretty bad late. It has a 20 second cooldown, which is reduced by hitting things, effectively using your shield, and landing your ultimate. By lategame, use this to reposition. You can also activate atlas-pouldron, wait until it's about to explode, then gapclose on the attacker to avoid being kited.
|
|

|
Ardan throws down the gauntlet, projecting a perimeter around the target area and gaining full vengeance. Enemies who cross the perimeter are stunned and take crystal damage. Successfully stunning an enemy grants Ardan vengeance. If Ardan leaves the perimeter it is immediately destroyed.
|
This is what makes Ardan Ardan. You do some jumping animation and punch the ground, summoning walls that surround yourself and stun enemies. This is a great skill for engaging, and can also be used to disengage as well. Use the Gauntlet to pick off non grouped enemies, and to separate the enemy team. A tough 3v3 fight can be turned into an easy 3v2, which can lead to an ace and objectives.
When Ardan is jumping, he can be stunned or displaced to stop his ultimate, putting it on cooldown.
Using a
 Crucible
 counters the Gauntlet, so pick up a
 Nullwave Gauntlet
 and use it on the opposing Roam if they're consistently blocking your ultimate.
Ardan, like any Roam, will end up having a lot of items with active uses. It can get confusing when, in a fight, you're faced with four activatable items and three skills to use at the right time. If that's the case, remember to use your
 Fountain of Renewal
 when your allies are at low health. This item can win a losing fight, so you MUST at least use this.
|
|
|
The core item on any Roam. By activating this, three green orbs seek out allies in range, and heal them for a percentage of their missing health. The orbs take time to travel, so use the fountain before your carry or jungler die before they're healed. Use this when your damage dealer(s) are low to turn a fight around.
If you're not building this, then you're not playing Roam, but a gold-starved carry.
|
|
|

|
Also a core item on any Roam. By activating this, you grant nearby allies a speed boost, making it great for running away or pursuing.
War Treads aren't necessary to rush, but getting Tier 2 Boots (the roller blades) gives out of combat movement speed, making your roams much easier.
|
|
|

|
Activating this causes a short ranged explosion around you after a delay, reducing the attack speed of those hit. This cripples auto attack reliant heroes, like WP
 SAW, WP SAW, WP
 Krul,
Rona, and WP
Ringo. Get this item when against WP heroes. Krul,
Rona, and WP
Ringo. Get this item when against WP heroes.
|
|
|
|
Activating this gives you and nearby allies a barrier that blocks crowd control for one second. This is highly effective against heroes with devastating multi person crowd control, like
 Ardan, Ardan,
 Lance, Lance,
 Adagio, Adagio,
 Phinn, and Phinn, and
 Catherine. When against one of these, rush crucible second. Catherine. When against one of these, rush crucible second.
|
|
|
|
Activating this shoots a bolt of electricity at your target, preventing your target from using items after a delay while dealing damage. Use this when against an opposing Roam that also uses their items. If you're in a match where no one builds activatables, then don't get this.
|
|
|

|
For once, an item that doesn't have an active! This adds true damage on every auto attack (reduced on enemy heroes), allowing you to secure important objectives like the kraken quickly. Get this item late game.
|
|
|

|
This makes your basic attacks shred 6% of your target's armor. Only get this when your team has two weapon powered heroes, with no bonesaw on either of them, while the enemy is stacking armor.
|
|
|

|
This makes your next basic attack after an ability deal a percentage of a target's health as crystal damage. Get this for some extra damage, if your're ahead, or against high health enemies.
|
Vision Top
One of the Roam's jobs is to secure vision around the map with scout traps and flares. It may seem like a waste of gold to buy one time items, but having vision over your enemies can win the game. Heroes like
 Taka
Taka,
 Flicker
, and
 Kestrel
 also have their invisibility nullified through flares and traps, making it easy to kill them.
|
|

|
A core consumable for a Roam. By activating this, you drop a scout mine that gives vision of an area, even revealing invisible heroes. However, enemy heroes can step on this to cause it to explode, removing the mine and revealing enemies caught in the explosion for a few seconds.
|
|
|

|
A core consumable for a Roam. By activating this, you shoot a flare that reveals all scout traps and enemies in an area for a few seconds. Useful to avoid facechecking... especially in late game.
|
|
|

|
A core item for a Roam as they approach full build. This item holds three charges which can be used to place a mine by tapping yourself, or to shoot a flare by tapping away. When having this, use it to place mines while having a full stack of flares on hand. Contraption is not enough vision for the entire game.
|
Whenever at the shop, buy at least 100 gold worth of vision items. It's a good rule of thumb to buy two flares for every mine purchased.
Where To Place Traps
Blue = Essential
Red = Behind
Green = Ahead
There doesn't need to be a mine in every place except for essential spots.

Early Game (0 - 4 Min) Top
Follow your jungler to the shop bush near the big tree. When the big tree spawns, either decide to contest it or help your jungler clear the small furries, then the tree near the tribush. When you're done, go to your lane mustache bush and babysit your laner.
Your goal for much of this phase to let your laner free farm. Shield your laner when they need it. Don't waste it, since it has a very long cooldown. If you can, harass the enemy laner with your B skill.
If your laner dies with the enemy laner there, hold the wave outside of turret range, taking minion aggro if you have to. Feel free to kill low health minions while you wait.
Mid Game (4 - 15 Min) Top
Your goal mid game is to get fountain as soon as possible, and win teamfights to get objectives.
Objectives like the gold miner and first turret are going to be contested. Put mines around your tribush and gold miner when buying the fountain to watch for the enemy sneaking a miner.
If your jungler is ahead, follow them when they invade the enemy jungle to place a few scout traps. Make sure your laner is safe, though. With your offensive mines, catching sight of the roam and/or jungler away from the lane should be a signal to collapse on the enemy carry and kill them or force them to retreat.
Teamfights midgame mainly occur in lane or near the gold miner. The first few fights are very important to win, since forcing an enemy to back can lead to first tower and/or gold miner, snowballing your lead. This is why fountain is a core item on all roams - it can turn a losing teamfight into an ace if used correctly.
If you've lost early and midgame, and created a fed enemy or two you cannot fight, turtle in your territory. Mine defensively to prevent deaths from an invading jungler. Do not contest gold mines if there is two or more enemies attacking it (unless they're not fed). The gold miner gives lots of gold, but gold leads mean nothing lategame. Your goal now is to let your carry and jungler farm up and defend your turrets. Additionally, work with your team to pick off a lone enemy in your territory. If a fed enemy can 1v3, it's probably time to surrender.
Late Game (15 Min+) Top
Your goal late game is to pick off enemies and end the game through a numbers advantage.
Everyone should be on an even playing field, unless you're seriously behind. By now, everyone should be max level and full build, so that 18/0 enemy Koshka can't 1v3 like she did earlier without getting popped. On the flip side, even if you're 20 kills ahead, don't play like you can 1v2 because you can throw so easily.
Play like there's a violent serial killer on the enemy team and group together. If your team mates are alone walking towards unmined bushes ping them back. Anyone who gets caught out can cause their team to lose the game, so look for 1-2 person picks (seen through placed mines and trapped with your gauntlet) and rush kraken/turrets after they die. Flare unmined bushes, especially the tribush near kraken to avoid facechecking.
If one or more of your teammates gets picked, the enemy is probably going to start doing kraken. Don't attack them while they're doing it, but aim to steal the kraken from them if you can then escape. Owning a stormcrown or aftershock and doing Ardan's autoattack>
Blood for Blood>autoattack can do surprising burst damage to the kraken which can steal it. If the steal is unsuccessful, run.
If the enemy team gets the kraken, aim to start a teamfight(if everyone's alive and healthy) and at least force someone to back. The kraken travels slowly, which gives some time for your team to defeat the other and then kill the kraken without the enemy making your job harder. If you're not able to fight, focus on attacking the kraken as she approaches your turret.
Teamfighting Top
The best part of Vainglory!
Teamfights start when one person full on attacks or crowd controls the enemy team. Whether that be through an Ardan gauntlet, or through an Alpha diving in, or a sick lance impale, a fight will begin until someone dies.
You're the frontline, so position yourself in front of your primary damage dealer(s). Bodyblock stuff like Skye's machine guns to protect your damage dealers. Don't go off and mindlessly autoattack and blood for blood the enemy - it's not your job to kill stuff, that's your teammate's job.
Due to your long shield cooldown, you likely can only shield one person per fight. Shielding the right person at the right time can save them from death, but not shielding correctly can result in a lost teamfight... or game. Save your shield until the enemy focuses your teammate. I would put a higher priority on shielding your carry, but if they aren't doing too well (see: 1/8 Ringo, no defense, pretending that he's melee), shielding your jungler will be more effective.
Your gauntlet is also a core teamfighting skill. Aim to trap two enemies within the walls, pushing the third person (preferably the Roam) out. Use a nullwave on the enemy Roam before using the gauntlet if they've been using crucible effectively. Don't stay near enemies that can stun you out of your ultimate. Throwing down the gauntlet one foot away from a Catherine is not a good idea.
Use your fountain when someone (preferably both) on your team is on low health. Don't forget to do this, it wins games.
War Treads can be used for rapid repositioning for your team. A
Ringo being attacked by a WP
Alpha could really use the shared movespeed to kite away from her and her 5,000 gapclosers. War Treads can also be used to follow up on an engage, like
 Gwen
Gwen's stun. You can also use the boots to clean up fights, activating them to kill off enemies running away.
When an autoattacking hero is attacking your team (not being kited), use your atlas to dramatically cut their damage output. WP Krul and Saw are monsters in lower tiers, but an atlas effectively removes them from the fight for a few seconds. Mobile attackers like
Ringo and
Vox can be hard to chase, so use your blood for blood to close the gap between them.
Please don't use your crucible randomly. Save it for AOE crowd control. An enemy Adagio or Ardan without a nullwave doesn't stand a chance when you crucible their easily blockable ultimates. Catherine and Phinn's CC are harder to block, but even managing to crucible one in five ultimates can save your team from a disastrous fight.
Use your contraption or flares in a fight against a hero with invisibility. Chances are, they're going to stealth, and using a flare can identify the location of the invisible enemy.
Conclusion Top
Thanks for reading my Ardan guide! I hope you learned something useful in it :D
Special thanks to MAINmiyagi for providing helpful critiques to my guide!


Quick Comment (1) View Comments
You need to log in before commenting.