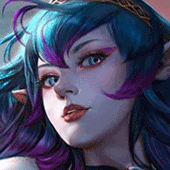
 Lorelai
 is amazing at
zone controlling and
influencing large parts of teamfights with potential teamwide slows, speeds, stuns, and a massive 1000+ HP barrier.
Fighting in choke points or messy teamfights her
 Splashdown
 can
stop an entire engage or strengthen your own. Just that one ability alone has an immense amount of utility.
Building CP, she can catch out enemies with
 Fish Food
 while nuking their HP along with a DoT zone. Both build paths will still have her
 Waterwall
 scale an immense amount of barrier, with a
15% Bonus Health ratio and a
100% CP Ratio.
Keep in mind that she is still a squishier hero than most Captains, so stay behind the frontline, and in front of the backline for optimal positioning.

 That's Swell
 | Passive -
Lorelai's
abilities leave pools of water on the ground. While on a pool,
Lorelai becomes
empowered. Using an ability while empowered consumes the pool she’s on. Additionally,
Lorelai's basic attacks deal crystal damage.
-
Empowered
Fish Food: Reduced delay before impact.
-
Empowered
Splashdown: Reduced delay before impact.
-
Empowered
Waterwall: Stronger barrier.
Pool Duration:
8s
Basic attack crystal damage:
55-110 (level 1-12) (+50% crystal power)
Empowered Bonus Crystal Power: 10-120
Because her auto-attacks are already scaling off of CP, building
 Alternating Current
 if you're playing Carry is essential. Auto-attacking and
Fish Food are her only sources of damage so we will want to maximize that.
Whenever you can, stay on top of a Pool for the bonus effects.
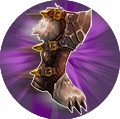
Fish Food | A - After
0.8s, her pet clam snaps the area, dealing damage to enemy units inside and stunning them. A pool filled with small piranhas persists afterwards, dealing damage over time to enemy units inside.
The
stun duration scales with 0.03% of
Lorelai's
bonus health.
Deals 50% damage to minions, structures, summons, and Mythic Creatures.
-
Damage: 40/75/110/145/ 215 (80% Crystal Ratio)
-
Damage/Sec: 55/95/135/175/255 (110% Crystal Ratio)
-
Stun Duration: 0.5s (+ 0.02% bonus health)
- Range: 8/8/8/8/9.5
We max this ability first regardless of role because of the 1.5 range increase. By using your
Splashdown to slow the enemy, you can get a stun from this fairly easily.
This ability is your main way of catching someone out, then throwing your
Splashdown on top of them to slow. This can also be a zoning tool to push enemies away from one part into your Pools.
You don't always have to land the stun part as the overtime damage can sneakily chunk some health.
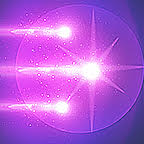
Splashdown | B -
Lorelai throws a sphere of water at target location. After
0.8s, the water forms a pool.
Speed up allied units inside. Slows down enemy units inside.
Slow strength scales with 0.015% of Lorelai's bonus health.
- Speed Boost: 1/1.2/1.4/1.6/2
- Slow: 20%
One of the best zoning abilities a support can have.
To give you an idea of how powerful this is, here's some maths.
2250 Total BONUS Health -
 Fountain of Renewal
,
 Crucible
,
 War Treads
,
 Capacitor Plate
,
 Rook's Decree
 (Assumed Build)
2250 * 0.015 (Lorelai B - Health to Slow Ratio)
= 33.75
33.75 + (Base Slow) 20% =
53.75% slow
With Captain Lorelai, she is able to throw out an AoE 53% slow on a 5 SECOND COOLDOWN.
This can change entire teamfights by preventing the enemy team from even moving!
Throwing her
Splashdown Pools depend on the situation and where you're fighting.
If you are in the jungle for example, close off choke points and tight spaces with these to give your team a huge advantage in speed.
In more open fights like in lane or at objectives, even putting Pools in the middle of the fight is helpful.
This ability is maxed second for less cooldown and faster speed boost (2.0 movespeed).
Waterwall | Ult / C -
Lorelai forms a barrier over the targeted allied hero.
Cleanses the target of any movement-impairing effects.
Temporarily grants the target a large barrier.
After
4s, the barrier leaves behind a
Splashdown Pool.
Barrier strength scales with 15% of Lorelai's bonus health.
-
Barrier Strength: 500/750/1000 (100% Crystal Ratio)
We will not overdrive this ability since most of the time other heroes can't burst through the barrier often enough. It is best used if you're anticipating a large amount of instant damage (i.e.
 Celeste
's
 Solar Storm
).
You can also use this on whoever if engaging a fight (i.e.
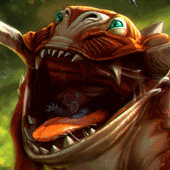 Grumpjaw
 or
 Ardan
Ardan jumping in) so you can get a
Splashdown pool further into the enemy team.
CORE ITEMS (Captain)
-
Fountain of Renewal +
Crucible : Both are self-explanatory. Both are the core items of any support that will keep your team alive. If the enemy team does not have much or no CC however, you can neglect buying
Crucible in exchange for something more useful.
-
Capacitor Plate : "But
Lorelai can only use this for her
Waterwall!" Since it affects
all healing and barriers, it will also work with
Fountain of Renewal and
Crucible. Not only does this give great stats, (especially 15% Cooldown Reduction) it also give your team a speed boost whenever you use
Waterwall on someone!
-
Rook's Decree : Works in conjunction with
Capacitor Plate, but more importantly gives your entire team shields for more protection.
-
 Atlas Pauldron
 : Not bought often simply because
Lorelai doesn't have any form of engaging to get in range for the active. It doesn't mean that she still can't use it though.
-
 Pulseweave
 : The speed boost from this helps keep
Lorelai slippery and harder to catch out. The massive amount of bonus health will also scale nicely with her abilities.
-
War Treads,
 Halcyon Chargers
, and
 Journey Boots
 : All three of these can be bought on support
Lorelai for their own uses.
War Treads is usually best if your team has communication and can coordinate when to engage or disengage fights.
Halycon Chargers is usually an early buy to deal with energy problems and have early Cooldown Reduction.
Journey Boots is my personal recommendation, because you will always have it up on a low cooldown to reposition quickly.


Quick Comment () View Comments
You need to log in before commenting.