Introduction and Guide Structure Top
This build aims to make Koshka do a few things:
- Maximize the chance of opportunistic kills using high burst damage
- Survive a gank in the lane, or 2v1 situation in the jungle
- Solo the Kraken
Players new to Koshka often inherit the misunderstanding that a well-played Koshka is the de-facto team carry. While that is true, going into a game with that mindset is likely not going to turn out well. Koshka works best as a support character - think a guerrilla fighter . Your job when playing Koshka is to either not be seen at all until you're guaranteed a kill, or to jump right in and prevent the enemy's carry from mowing down your team. More on each of those things in the sections to come.
With these ideas in mind, this Koshka build is really two parts. The first part is the things you should build (and the correct time to build them), and the second is a play-style which matches the items you're building. Note that if you prefer a very 'in-your-face' Koshka, this build is not for you. If you prefer to waltz around everywhere regardless of your team's pings, this is also not for you.
Each of the sections below matches with the eponymous category under the items to be built.
Game Start Top
This is when the game first loads and you're in the base. Start off by loading in two
 Halcyon Potion
 and a
 Crystal Bit
, then head off into the jungle immediately. You should reach the entrance to the jungle by the time the game announces that 'The Battle for the Halycon Fold has Begun', and make for the pair of mobs closest to the jungle shop on your side. While you're headed to the farming location, you should (1) open your shop and navigate to the 'Defence' page; and (2) put one skill point into
 Twirly Death
. The former sets you up to buy an
 Oakheart
, and allows you to minimize the amount of time spent in the jungle shop because you can walk right past the jungle shop, open your shop menu, and select the item without stopping. The latter maximizes your ability to farm and reach Level 6 as quickly as possible.
Many guides recommend that you start with
 Oakheart
 instead of
 Crystal Bit
, which indeed gives you a little more HP to start with. In theory, that's good for farming because it reduces the chance that you'll need to head back to base to regenerate. However, if you end up in a 1v1 battle before you reach Lvl 2, I've found consistently that having the additional damage on
 Twirly Death
 makes all the difference in winning or losing, whereas having the additional HP does not ensure your survival as much. It also allows you to clear mobs faster (approx. 1 less hit per pair of mobs), which does add up when you're trying to farm intensively.
Early Game Top
Early game is anytime up till when you reach Lvl 6. Specifically, it's up till you get to put your first skill point into
 Yummy Catnip Frenzy
, at which point you become viable as an initiator in the lane. Until that happens, your job is extremely simple: Farm the hell out of your half of the jungle.
If you started out with the pair of mobs right next to your end of the jungle shop, the next set of mobs you should move to is the single healing mob directly above your current location, then to the healing mob at the entrance of the jungle. Lastly, you'll go on to the pair of mobs just behind the minion mine. There's a reason for this specificity. If you attempt to go straight to the pair of mobs behind the minion mine thinking that you'll get four mobs in the shortest amount of time, you'll come out of it looking pretty bad on the HP side of things. This also tends to coincide with the time when the enemy is just about done with their mobs and might entertain the idea of invading your jungle. You don't want to be caught with less than half your HP bar, your skills on cooldown, and a Taka happily coming along to poke you a few times before vanishing. Instead, you want to stack the effects from both the healing mobs before tackling the pair behind the minion mine, allowing you to come out with nearly full HP.
By that time, the first set of mobs next to the jungle shop should have regenerated, and you can go back to them. Repeat this cycle until you reach Lvl 4, after which the rate at which you farm mobs will start to be much higher than the regeneration rate. To accommodate this, stop by the jungle shop and load up on two Oahkeart. You should have more than enough money to do so. The reason for getting two
 Oakheart
 rather than a single
 Dragonheart
 is that combined, they give you 100 HP more for a modest price difference.
If you're the only person in the jungle, you should reach Lvl 5 just as the announcement for minion farms is made, i.e. at the 4 minute mark. An amateur mistake is to rush straight for the minion mine the moment it appears, but always remember that as your minions become stronger, the enemy gets more gold from killing them. If your laner is facing a particularly enthusiastic
 SAW
SAW for example, your capture of the minion mine ends up feeding the enemy laner a lot more gold, allowing them to get the edge on your laner in the upgrade tree. You don't want that. If you're playing in solo-queue at the lower levels where another jungler in your team is bound to rush the minion mine, throw your hands in the air and go for it with them to minimize the amount of HP they lose.
By the end of the early game, you should have used both your potions and reached Lvl 6. This is where the fun starts.
Farming Checkpoint Top
I've named this the 'Farming Checkpoint' because it's the time when you can choose to stop farming. This doesn't mean that you stop spending time in the jungle and clearing the occasional mob, but it means that you no longer live exclusively in the jungle, and instead respond to the enemy's movements.
The reason is that once you have
 Yummy Catnip Frenzy
, you can easily initiate or finish in the lane by stunning an enemy so your laner can wipe them out, or by going in for the last hit on an enemy escaping from your laner. Before doing this though, you'll want to pick up a
 Light Armor
 from the jungle shop.
Why
 Light Armor
? Intuitively it sounds like you should change this to adapt to the items which the enemy is building. That is strictly true, and you want to be on an
 Aegis
Aegis if the enemy is ability heavy. However, at this stage in the game, you'll find yourself catching a lot of enemies who run from your laner to the safety of their turrets. If you are able to withstand a hit or two from the turret -- which you can, because you not only have two
 Oakheart
, but a
 Light Armor
, you can easily take them down and escape into the jungle to recover. That's the motivation behind this build. If you are able to consistently do this, you will severely impede the enemy laner's ability to level up in lane, and draw the enemy junglers out to the lane to support their ally. That's exactly what you want.
One last note, don't be the Koshka who blindly runs after the enemy while they kite you straight into the path of your turrets and becomes a blood smear on the lane because of turret fire. If you go in, it should be to land two hits in rapid succession at most, and then to speed right out using the speed boost from your passive. Nothing more.
Mid-Game Top
Mid-game is going to be when you start racking up the kills. Your aim here is to rush an
 Aftershock
, which will increase both your damage and survivability. Some people will happily sit around on a huge pool of gold (around 1.5k) while waiting for the 2.6k necessary to build
 Aftershock
 because "the guide said to rush Aftershock"! Please don't be one of those people. Build a
 Chronograph
, followed by an
 Eclipse Prism
, and you'll get to
 Aftershock
 with exactly the same amount of gold, but reap the benefits of the intermediate items meanwhile.
There's also a reason for this order. Mid-game Koshka's who attack a lot tend to find themselves energy starved because both
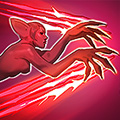 Pouncy Fun
 and
 Twirly Death
 take up a fair amount of energy. Building
 Chronograph
 pretty much ensures that you'll have more than enough energy to use, which allows you to stay hidden in the bushes next to the lane almost indefinitely. Your primary income here is no longer going to come from the mobs in the jungle, but from killing enemy heroes.
A note on a very useful tactic. If I've just beaten off the enemy and I'm waiting for them to come along, but it looks like it would be too dangerous for me to try to rush the enemy turret, I go into the jungle (or in the lane) where there are two or more mobs, use
 Twirly Death
 once, and disengage. The point is to build up as many passive stacks as possible, and you can do this for up to 12 mobs. The caveat is that you can't perform any normal attacks in-between
 Twirly Death
 uses, which means that you have to bear the full cooldown cost. This is perfect to do while waiting for the enemy, because it means that when you do go in to attack the enemy, every basic attack which you make is going to be a critical hit. Think about that for a moment :)
Gank Checkpoint Top
Once you've built your
 Aftershock
, your next target will be for
 Alternating Current
. Why not
 Shatterglass
? Well it turns out that because
 Twirly Death
 has the property that the hit following the use of the skill will cause increased damage, if you add
 Alternating Current
 to the mix, you'll end up with more consistent damage output. Think of it this way:
1. Initiate with
 Pouncy Fun
2. AoE with
 Twirly Death
3. Basic attack with boosted damage because of
 Twirly Death
 and
 Aftershock
, and HP regen because of
 Aftershock
4. Basic attack with boosted damage because of
 Alternating Current
5. Stun with
 Yummy Catnip Frenzy
, or else a basic attack
7. Repeat from #2.
Done right, this takes massive, massive chunks out of your enemy's HP or kills them outright. You can also do this to entire groups, prioritizing laners with weaker armor for your basic attacks.
Late-Game Top
Late-game starts at around the 15-minute mark. By this time you should have ponied up enough gold to purchase
 Alternating Current
, and you're free to roam everywhere or ambush anyone so long you're mindful of their status on the threat table.
Here's the best bit: You can solo the Kraken if you have full HP and energy. This isn't saying you should run off and do it right away, but an excellent circumstance is often when you get into a 3v3 gank (which is pretty common by time) and you are the sole survivor. You Ace, which gives you full regen, and you rush straight towards the Kraken. Hit it with everything you've got, alternating skills using the method described in the previous section. You'll kill the Kraken with just a bar of HP left, but immediately regenerate all of it because you Ace again when you take down the Kraken. By this time, your allies should be more-or-less respawned, and you can watch the look on the enemy's faces when they realize that a Koshka just solo-ed the Kraken. I've gotten multiple thumbs up for this party trick plenty of times.
It's also here where you realize that this is the exact reason why we bought a
 Light Armor
 at the start instead of investing in a
 Kinetic Shield
, for example. I've tried it with an
 Aegis
Aegis and still wasn't successful, because the Kraken's hits count as basic attacks.
The last thing you need to do is to increase your movement speed, which allows you to react to changes on the map, or to go back to base to regenerate and then head out again. This bit is straightforward -- buy a
 Sprint Boots
, and eventually upgrade them to
 Travel Boots
. You don't really need
 Journey Boots
 unless you have money to spare, so keep that for the absolute last upgrade.
End-Game Top
End-game is very simple. Your goal for this section is to maximize your persistence, and for that, you'll need as much HP as you can get. Work your way up towards a pair of
 Crucible
, and activate
 Reflex Block
 where necessary to protect your team (or yourself) from enemy ultimate skills. You should be staying very close to the lane, and ideally very close to your enemy's base, hiding in the bushes just near the entrance to their jungle. When they come out, initiate and wipe them out one at a time to maintain your team's momentum. When the scene looks clear, rush the turret and destroy them, tanking the turret hits for your team if there are no minions around.
Nothing quite like that satisfying sound of the enemy's Vain crystal breaking :)
Thanks for reading!


Quick Comment (5) View Comments
You need to log in before commenting.