Table of Contents Top
Introduction Top
Hello. My name is XapocaliptusX(IGN) and I play Vainglory on European server. I started playing in August of 2016 and I've been playing ever since, but not during the summer seasons of 2017 and 2018. I play both game modes regularly and my position is always Captain. Recently, I have had quite some success with the new Hero -
 Yates
Yates, so I thought, that it was a good idea to write a guide on him. I have written some other guides on different heroes and they've attracted a lot of attention from people and received quite some appreciation, so I'm pretty confident with this one. Also, I want it to be compatible with both 3v3 and 5v5 game modes, so it could suit the reader regardless of which game mode they're playing.
That being said, I hope you enjoy reading this guide, since it's gonna be a hell of a long ride!
My VGPRO: XapocaliptusX.
My other guides:
About The Hero Top
|
|
|
YatesOverview
|
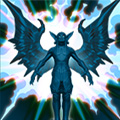
Yates is a selfless and fearless warrior, who excels at locking down enemies and turning the tables in team fights. His global presence makes him a constant threat on the battlefield. Amazingly, he can either devastate enemies, or save teammates regardless of his location on the map. That's what makes him very reliable in almost every situation.
Yates is most commonly played as a Captain, since this is the position, where he could make the best out of his kit.
Abilities
(To see details, hover on the icons.)
|
|

|
Devastation FlailSlot: Heroic Perk
|
Yates's Perk focuses on damage and mobility. The movement speed boost can help you get into a good position to cast your Abilities, or it can help you escape danger. The damage is decent in the early game and is useful for ganks, since it can help bring down targets faster, but it will eventually fall off as the game progresses. But still, it's important to keep track of your perk to know when you can reposition and deal more damage.
|
|

|
Wolf's MawSlot: A
|
This Ability is
Yates's bread and butter. You can use it to pull enemies out of their positions and into your team, or to separate them from your teammates.
Wolf's Maw's only downside is, that it has a very long cooldown. Which means, that if you miss, you'll have to wait for quite some time to get another try.
Don't forget, that the damage this Ability deals is quite significant and it can interrupt dashes, such as
 Afterburn
, or
 Troublemaker
.
Always max
Wolf's Maw first to keep up your damage and reduce it's cooldown on overdrive significantly.
|
|

|
OverwhelmSlot: B
|
This is an Ability, which allows
Yates to truly overwhelm his opponents, hence the name. The damage is low, but movement speed boost is pretty significant and area-of-effect stun is a luxury many Captains can't afford.
What's fascinating, is that you can use
Overwhelm in combination with any of your other Abilities:
- Activate
Overwhelm after the third attack of
Devastation Flail for a huge speed boost, which could help you get into a better position to stun your enemies.
- Use it before, or after you pull an enemy with
Wolf's Maw to follow it up with a stun immediately.
- Trigger
Overwhelm before using
 Iron Mandate to deliver a stun right as you jump into a fight.
I recommend maxing
Overwhelm second and getting it's overdrive for increased speed boost and stun duration
|
|
|
Iron MandateSlot: Ultimate
|
This Ability allows you to jump into a fight from any location on the map and gain a huge advantage over your enemies, since
Iron Mandate grants teammates barrier, while damaging and slowing enemies caught in it's range. Plus, you can even deliver an area-of-effect stun right as you land if you use it in combination with
Overwhelm. And therefore, you're able to control the situation and potentially turn the tables in almost any team fight.
A little side note: You can also use
Iron Mandate to jump back to base if you get in trouble. Although this is a selfish tactic, it could save your life if necessary.
I recommend skipping the third rank of
Iron Mandate for both overdrives, unless you need that extra damage and barrier in team fights.
Play style & Mechanics Top
In this chapter, I will break down my play style and mechanics, that I have developed over time.
Role: Captain
(Reading this part is optional.)
A Captain is basically a Hero, which helps its team one way or another. Some of them focus on protecting their teammates and keeping them alive, while others help them engage enemies using aggressive tactics. Captains must spend their gold on vision and defense items to gain map awareness and make sure their teammates are safe. Speaking of gold, they earn it from assists and shared bounties. A captain must not steal gold from last-hits by any means necessary.
General Play style
I like to play
Yates as a semi-aggressive Captain. Since he doesn't bring that many defense options to the table, we have to work with what we've got. Basically, your goal is to snowball the enemy team as hard as possible and do whatever it takes to always keep them behind. You can often achieve this by aggressive rotations with your teammates, such as ganking enemies, stealing jungle camps, etc. But most important step is to secure as many objectives as you can. They're the the primary source of gold, so if you're trying to gain an advantage there's no better way than focusing on them.
Of course there could be times, where you fall behind. In that case, you should focus more on the defense and play more safely. Because enemies will usually be stronger at this point, so it's not worth risking to fight them. However, you'd still have to focus on Objectives in order to catch up with the opponents.
Playing Aggressively
Playing aggressively can be quite rewarding and sometimes even necessary. But usually, that's when you have a decent gold lead over the enemy team. It can also depend on the team composition. For example, if your team is stronger early, use that to your advantage and play aggressively in the early game.
Choose the fights, that win you objectives, focus on skirmishes, ganks and catch any advantage you can, that gives you an upper-hand.
Playing Passively
Play passively when you're behind, or when your team is weak early. Don't take any chances and choose your fights very carefully. You don't want to get caught off-guard. Just protect your teammates and prevent enemies from engaging. Get vision around objectives and have patience as you scale up.
Powers Spikes
A power spike is basically a point in the game, when a Hero is stronger than usual. You can often use them to take favorable trades, team fights or skirmishes, depending on what kind of power spike your Hero has at the moment. Speaking of which, there are 2 kinds of power spikes: Level and Item spikes. Each Hero has a unique set of these spikes and ways to play around them.
-
Yates's first power spike comes at Level 2, where he unlocks
Overwhelm. Using it aggressively in the first team fight could result in a great outcome as long as you manage to land it.
- The next power spike is at Level 6 and that's where you unlock
Iron Mandate. Since it'll be so early in the game enemies won't be prepared for it, so a well timed, well positioned Ultimate will give you a huge advantage in a team fight.
- The final power spike is when you purchase your first tier 3 item -
 Fountain of Renewal. It gives you an upper hand in terms of survivability during team fights. Be sure to use this to your advantage.
Team Fights
Yates has a huge advantage in team fights. His
Iron Mandate is a global ability and
Overwhelm is an area-of-effect stun. Not to mention how good he is at singling out enemies with
Wolf's Maw. What more could you ask for?
Well, it could be difficult at times to land your abilities properly, since they all require good positioning and timing. So the best thing you can do is have patience. Wait for the perfect moment in team fights to use your abilities. And use them in combination with each other whenever possible for the best result. Pay attention to your teammates' positioning and make sure you don't overextend into the enemy team. Aim your
Wolf's Maw carefully and pull enemies into the hands of your teammates. That way, they'll be much easier to focus. Lock them down with
Overwhelm whenever they get out positioned and finally, use your
Iron Mandate in the last seconds of battle. weather you're winning or losing, it can have a huge impact on the gameplay.
When it comes to items, you should also save them for the last. Some of them, like
Fountain of Renewal can save your teammates' lives when used patiently, so don't rush it.
So in conclusion, protecting your team is the most important thing for a Captain in team fights.
Item Explanations Top
Yates has many interesting build paths. In this chapter I'm going to explain the purpose of each item, that is commonly purchased not only by
Yates, but other captains as well. So that you'll understand what to buy and when.
Core Items
These are must-buy items for all captains. Not having them is a huge disadvantage for your whole team. And therefore they must be prioritized no matter what happens.
|
|
|
Fountain Of Renewal
|
This is a single most important item in any captain's build. And that's simply due to its ability to heal the entire team. It comes in very handy in team fights and especially in close calls, since it can often save your teammates' lives and potentially turn the tables in your favor.
Keep in mind, that the lower your teammates get, the more
Fountain of Renewal will heal, so try not to use it too early and too selfishly.
|
|

|
War Treads
|
Great for initiating fights, chasing down fleeing enemies and helping your team escape. Either way,
War Treads is a very useful item. It comes at an exceptionally low price, which gives you an opportunity to purchase it and use it early. Pay attention to positions of your teammates in team fights, so that you'll know when is the best time to use
War Treads.
|
|

|
Crucible
|
This item is a fantastic life saver in team fights and your number one tool for avoiding high crowd control abilities such as
 Verse of Judgement
, or
 Oblivion
. But it requires good timing in order to be used properly. If used at the right moment,
Crucible can turn entire fights around, so be sure to pick this item up for that alone.
Defense Items
Defense items come in very handy when your team is generally too squishy, or when enemies have high burst damage. They increase your survivability, allowing you to stay on the frontline for longer.
|
|

|
Rook's Decree
|
Ideally, you'd want to purchase
Rook's Decree when you don't want to take chances initiating team fights, or when your teammates are mostly vulnerable and need some extra protection. The barrier ensures, that they are protected from enemy damage and it will allow them to output damage, or flee safely. Either way, it's always a good idea to add
Rook's Decree to the mix.
|
|

|
Pulseweave
|
Pulseweave is a great tool for initiation. It helps you deal more damage in team fights while slowing enemies. Purchase it in order to maximize the strength of your engagements and be sure to utilize more aggressive tactics for the best outcome. Be careful not to get too far into the enemy team though. Stay close to your teammates and have patience.
|
|

|
Atlas Pauldron
|
This is an item with a very specific purpose: Shutting down attack speed reliant heroes. The amount of armor it grants the bearer isn't much, but the active component of
Atlas Pauldron is very useful and sometimes it even makes this item necessary. Be sure to pick it up if you're playing against
 Krul
Krul, or other heroes with high attack speed.
Be patient when using
Atlas Pauldron though, since it has such a long cooldown. If you fail to land it, you won't get another try in the same fight.
|
|

|
Capacitor Plate
|
Capacitor Plate can be used to enhance the effects of
Iron Mandate,
Rook's Decree,
Crucible and
Fountain of Renewal. Not only do they grant higher healing and barriers, but now they speed up your teammates too. The speed boost can come in handy during engages, while enhanced healing can be life saving for your teammates. Not to mention, that barriers will help them out too. The only issue is, that
Yates cannot fully utilize
Capacitor Plate, because he doesn't have any healing, or barriers built into his abilities(excluding
Iron Mandate). Therefore, it isn't always a good option.
Utility Items
Utility items are very situational, but they can help you in some ways if you decide to purchase them.
|
|

|
Contraption
|
A great item for vision control and energy/cooldown management. Usually, you should get it in the late game, unless enemies have stealth heroes in their team. In that case, make sure to pick
Contraption early.
|
|

|
SuperScout 2000
|
Almost same as
Contraption. Only this time, it's in 5v5 .
SuperScout 2000 grants less cooldown reduction, but more energy per second than
Contraption. Their active components are almost same. The difference is, that there are no
 Scout Trap
s in 5v5, so this one can only throw flares.
Use this item to get the maximum vision control around objectives and choke points to ensure your team's safety.
|
|

|
Stormcrown
|
Stormcrown allows you to clear jungle camps and objectives more quickly. The burst damage is effective against heroes as well, so buying this item can help you deliver more ganks and skirmishes. So if you want to play aggressively in the early game, be sure to pick it up. Otherwise, I wouldn't suggest.
|
|

|
Nullwave Gauntlet
|
This item is ideal against aggressive team compositions, that have high diving, or engaging potential. But it works against other compositions too, as long as you use it properly. Usually, you'd want to silence an enemy captain in team fights. With their items disabled, they shouldn't be able to do much, giving you an opportunity to either escape or engage safely. Depending on the situation. Either way,
Nullwave Gauntlet is not too bad of a choice.
|
|

|
Shiversteel
|
Shiversteel will allow to you keep targets in range for your teammates. The attack speed should also help you utilize
Devastation Flail better. Overall, it's a pretty good early item for ganks and skirmishes, but otherwise it's not really a viable option.
Scaling Throughout the Game: 3v3 Top
Yates's scaling is very strong in 3v3. He is able to deal a lot of damage in the early game and has a decent ganking potential. When moving into the later stages of the game, his defense and utility stats make up for what he's missing in terms of damage and he becomes more of a team fight oriented hero.
Early Game
- High Damage;
- Moderate Defense;
- Low Utility.
In the early game, make sure to use your burst potential to your advantage. Coordinate with your Jungler to carry out ganks and skirmishes in the jungle, or stay on lane with your Carry and harass enemies. Either way, you should take every opportunity you see to make use of your abilities in a way, that benefits your team the most.
Be sure to get vision established across the map throughout this stage. Buy
Scout Traps and
 Flare
Flares every time you enter a shop and place them in bushes and choke points to be aware of enemy rotations. Use
Flares to avoid getting ambushed, or to reveal and keep track of stealthy heroes.
|
|

|
Early Game item: Ironguard contract
Ironguard Contract will help your teammates effectively clear the jungle without losing much health. In lane, it will allow your Carry to recover faster by farming bigger minions. Overall, it's a great item for staying healthy.
|
Mid Game
- Moderate Damage;
- High Defense;
- Moderate Utility.
In the mid game your damage will start to fall off significantly, but that doesn't stop you from having more opportunities to overwhelm your opponents.
As the game progresses, team fights occur more frequently. Always be ready for them and make sure to play safely whenever you aren't. Take care of your teammates and watch out for any opportunities to secure team fights with ease.
The objectives are very important in this stage. They are the primary source of gold and securing them is absolutely necessary.
- The most important kind of objectives are Turrets. Not only they handout a lot of gold, but they open up more opportunities for strategic gameplay when destroyed, since enemy defenses will be crippled and you'll have more space to maneuver.
- Focusing on Gold Miner is also important when it comes to getting ahead in overall gold. Usually the best time to take it is when you get an Ace by winning a team fight. Be sure to get vision around this objective as well.
- And finally, there are Crystal Miners. Focusing on the enemy crystal miner can be risky, so don't do it alone. When killed, it grants the killer a buff, which allows them to deal 15% more damage, take 20% less damage and slow nearby enemies by 25%. Other than that, crystal miners are also very helpful in team fights.
Late Game
- Low Damage;
- High Defense;
- High Utility.
In the late game your damage is practically non-existent. However, your defense and utility stats will ramp up due to the items you've purchased.
Vision is a crucial part of the late game. Buy
Contraption and set up
Scout Traps all across the map and use
Flares to avoid face checking bushes. Being caught off-guard in the late game means almost certain death, so make sure to always stick together with your team.
The biggest objective - The
Kraken takes place in this stage of the game. Once unleashed, she can tear down enemy defenses, earning you more gold and allowing you to maneuver more freely across the battlefield. Ideally, you'd want to capture the Kraken after winning a team fight, because enemy defenses will be vulnerable at this point and there will be no one to potentially steal her from your team.
Overall, late game is extremely important and you should take that to account. Play cautiously with your teammates, avoid getting ambushed and try your hardest in every single fight for the best outcome. In the end, that's all, that matters.
Scaling Throughout the Game: 5v5 Top
Yates has a significantly stronger impact in 5v5, since there are more lanes to focus and more teammates to fight along. He can jump to side lanes with
Iron Mandate and easily devastate opposing carries, making him a constant threat on every lane. As he scales up,
Yates's damage falls off as usual. However, he can make up for it with pure defense.
Early Game
- High Damage;
- Moderate Defense;
- Low Utility.
In the early game you should focus on mid lane. Simply protect your Carry and trade blows with enemies.
Ironguard Contract should allow you and your Carry to stay healthy in the laning phase. Coordinate with your Jungler to carry out ganks during this period. Even a single gank can have a huge impact on lane.
Later on, when you unlock
Iron Mandate you can start roaming between side lanes to help your teammates in various ways. Pay attention to their positioning and wait for an opportune moment to use your Ultimate. Help them secure kills to get ahead in overall gold. So in conclusion, your early game is very strong and you should use that to your advantage.
Mid Game
- Moderate Damage;
- High Defense;
- Moderate Utility.
In the mid game your damage falls off quite a bit, but it's still enough for bursting down squishy targets. The mid game is also the time, when new objectives start to appear on the map. Namely,
Ghostwing and
Blackclaw. They impact the gameplay in different ways:
- Ghostwing grants out of combat barrier and regeneration, which allows your team to stay healthy in-between fights. Engaging the opposing team while the barrier is still active can lead to a significant advantage early on in a team fight.
- When unleashed, Blackclaw will push the mid lane, destroying turrets one by one. You should use this to your advantage. For example: You an use it as a distraction for split pushing, or you can just push the mid lane with it.
Both of these objectives are very important and you need to approach them carefully. Be sure to get vision around them and watch out for any opportunities of securing them. Speaking of vision, it becomes ever more important as the game progresses. Luckily, you don't have to buy
Flares and
Scout Traps in 5v5, so
SuperScout 2000 can wait. All you need to do is place your Scout cams strategically around objectives and choke points.
Team fights are more frequent in the mid game. Although they're not important, you should still be ready for them, since some fights can potentially win you objectives and give you a significant boost in overall gold. Again, your goal in team fights is to protect your team. Don't worry about your damage. Just do your best otherwise.
Late Game
- Low Damage;
- High Defense;
- High Utility.
Yates's damage in the late game is practically non-existent, but you have more defensive and utility capabilities in return. And besides, damage isn't something you should worry about, because this is the stage, which the entire game was leading up to. At this point, everyone reaches their full potential and starts looking for team fights. Speaking of which, team fights are extremely important in the late game and one of them will ultimately end the game. That's why you should be prepared for them at any given moment. And whenever one breaks out, you must do anything to defeat your opponents.
All that aside, I must point out, that objectives are very useful in the late game. As I previously said,
Ghostwing and
Blackclaw help you in different ways. If you're looking for Ghostwing, be sure to capture it early. That should keep your team healthy before the fight breaks out. Blackclaw however, is more viable after a successful team fight. Unleash it to push enemy turrets and weaken their defenses.
Keep your vision items handy and stick together with your team for the rest of the game and do your best in team fights for the best outcome.
Conclusion Top
So, in conclusion,
Yates is Captain, who can utilize aggressive play style, but can also perform well on the defensive side when needed. Either way, he has a huge impact in team fights.
Yates's abilities require good timing and positioning in a usual Captain fashion, but when used precisely, they can completely turn the fight around in your favor. His global presence and an ability to single out and quickly burst targets down makes
Yates a terrifying foe.
PROS
- Versatility(Defense/Offense);
- High team fight potential;
- Strong early-mid game;
- Global presence;
CONS
- Long Cooldowns;
- Difficult energy management;
- Long delays on Abilities;
Thank you very much for reading my guide on
Yates. I hope it was helpful and enjoyable for you to read. Since I spent a good few weeks writing this guide, your time is much appreciated.
If you have any suggestions, complaints, or arguments about this guide, don't be afraid to drop them off in the comments. I'll do my best to not leave them unnoticed.
This was XapocaliptusX. Thanks again for your time. Good luck and have a nice day.


Quick Comment (1) View Comments
You need to log in before commenting.